Lately it’s been getting more and more difficult to tell the difference between photos taken on a camera and photos taken on a cell phone, and that’s really impressive!
For over a decade the tell-tale difference between phone and camera photos was the presence of bokeh; the blurry characteristics of the out-of-focus part of the image. Until recently the vast majority of cell phones were incapable of producing the shallow depth-of-field necessary to create noticeable bokeh, which significantly limited cell phone photography’s creative possibilities. On a camera, whether it’s mirrorless or a DSLR, the photographer is able to control the aperture on the lens, giving them full control of what is or is not in focus. Phones on the other hand are typically limited to a very wide depth-of-field, meaning almost everything is clearly in focus whether you like it or not. But today, with so many new smart phones sporting advanced cameras, the days of creative sacrifice are over.

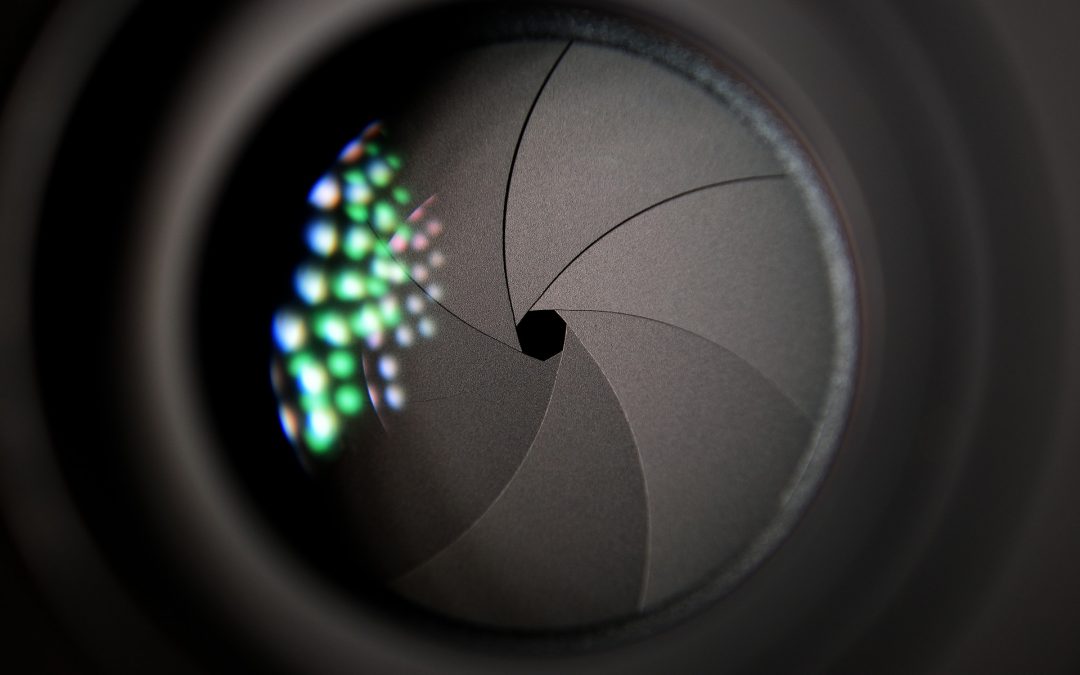
The F-Stop Basics
The aperture setting on your camera (and on some new phones) can be used in many ways to enhance your photos. On a camera you are able to set the exposure of your image and control the diameter of your lens’ aperture blades. Opening the blades wide (anywhere between f/1.2 – f/2.8) will give you a very shallow depth-of-field, meaning a narrow part of your image is in focus. Closing the aperture blades on your lens (anywhere between f/11 – f/16 and beyond) will seriously widen your depth-of-field, meaning that almost everything in your image will be in focus.
The f/ values are known as ‘f-stop’ values, the smaller the f/ value the wider the opening, and the larger the f/ value the smaller the opening. For example, most professional grade lenses are able to open very wide (anywhere between f/1.2 – f/2.8) which gives you more creative options when taking photos. Cheaper lenses or very long zoom lenses usually have a maximum aperture of about f/4 – f/6.3, which still produces noticeable bokeh.
Cell Phones
On most cell phones you have no control over what your aperture setting is, so if you want to open it or close it you’re out of luck. Now, on some phones you are able to check what your camera app sets your f-stop value to (it’s usually in the image files ‘properties’ tab), but it’s not too helpful knowing your f-stop after the fact.
For a long time the only way to really duplicate the shallow depth-of-field look on a cell phone was by using third party apps that artificially blur the background, which in some situations is useful. However the issue with this is that many of the apps can only blur the background in photos that have already been taken, meaning that the bokeh background these apps provide is little more than a filter which is applied to your .jpg file after it’s been taken. So for the most part these apps really don’t work that well and it’s easy to tell that the bokeh is computer generated rather than created organically.
The Good News
New phones have features that allow you to create much more authentic bokeh, like ‘Portrait Mode’ which is available on the iPhone (iPhone 7+ and newer). This really innovative feature makes use of the phones dual back cameras and creates bokeh by blending two images simultaneously into one .jpg file. This is a much better alternative to the filter based third party apps that many phone photographers were using to create depth-of-field. Portrait mode requires a lot of ambient light and crops the image before it’s taken, so you have a much more narrow perspective, but the end result looks great! In fact most of the time it’s difficult to tell whether photos taken in portrait mode are from a phone or a camera, which is really incredible considering the price difference between an iPhone and a Canon or a Nikon. But what’s really impressive is the new aperture control feature on the iPhone XS and XR which offers a ‘Depth Control’ setting that allows you to pick the f-stop of your image. However, unlike on an actual camera, the ‘Depth Control’ feature is only adjustable after the photo has been taken.

Okay, I Get It, But Why Does Aperture Matter?
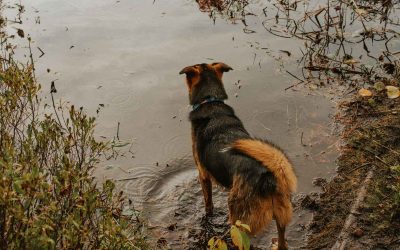
When photographing your pet the aperture setting can turn a really busy photo into a beautiful concise portrait. The isolation caused by wide apertures is an incredibly useful tool when trying to upgrade your image from good to great, and it allows you to make photos that really wow people. This comes in handy especially when you’re trying to take photos in an environment that isn’t exactly good looking. Photographing in a muddy backyard or a fenced in park? Doesn’t matter, shooting wide open makes it clear to the viewer what the focus of the image is while subtly minimizing the background. So no need to worry about a distracting environment taking the attention away from your adorable pet!
Another key component of aperture is its ability to maximize ambient light. Sorry cell phone photographers, this one is just for the camera users out there. When you open your aperture really wide (f/1.2 – f/2.8) you allow more light to reach the digital sensor, allowing you to take brighter images in low light. Low light photography is tough, in fact it’s arguably the most difficult type of photography considering that so many new cameras still struggle with detail retention in dark images. But by setting your aperture to a wide setting you not only get a beautiful blurred background but a crisp, grain free, low light image without having to boost ISO or really slowdown your shutter speed (There will be future blogs about the roles ISO and shutter speed play in photography). This opens up a whole world of possibilities for your pet photography and it can really allow you to create stunning pet photos in a shabby setting.
With Portrait Mode and the new Depth Control feature you can use your phone in ways previously unimaginable. Now every dog walk is a potential photo shoot where you can create breathtaking photos of your furry buds for your website, social media or company calendar.
Until next time, happy shooting!


Recent Comments